Custom Connector Configuration
Initial Setup Process
To configure a Custom SMS Connector on the MoEngage Dashboard:
- Navigate to Settings -> Channel -> SMS & Connectors
- Click on the SMS Connector Config tab
- Locate the list of integrated connectors on the left-hand side
- Click +CREATE beside the Custom Connectors option
Connector Configuration
After creating a new connector:
- Select the newly added 'New Connector' from the left menu
- Fill in the required information
- Click Save to complete the Custom Connector Configuration
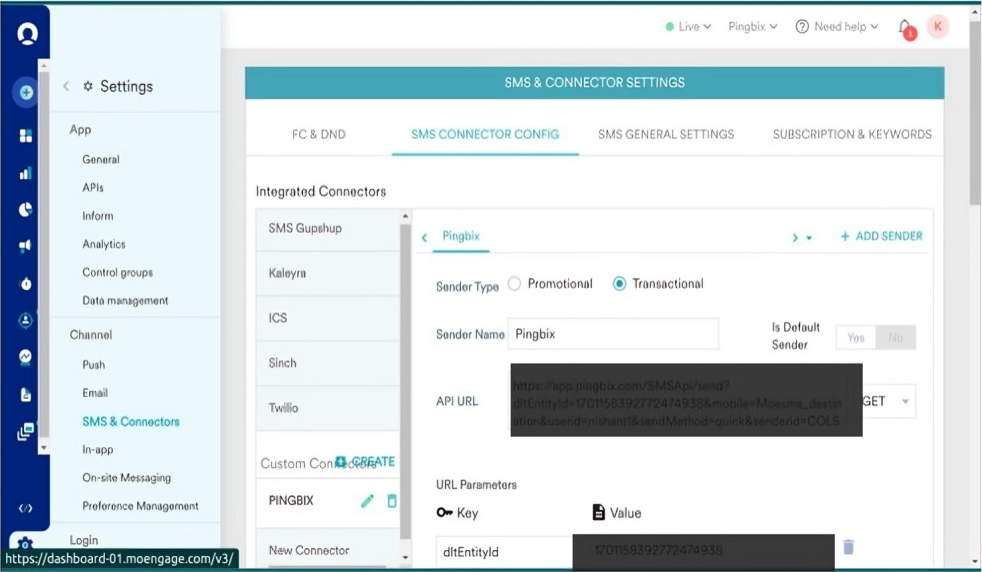
Connector Configuration Settings
Important Parameters
Required Keys
When setting up the connector, ensure these key parameters are configured correctly:
- Destination Number Key: Moesms_destination
- Message Key: Moesms_message
- DLT Template ID: Moesms_dltTemplateId (for India operations)
Note: These parameters are case-sensitive and must be entered exactly as shown.
Campaign Creation Process
1. Accessing Campaign Creation
To begin creating a new campaign:
- Log in to your MoEngage account
- Go to "Create New" on the dashboard
- Select "Campaign" under the Engage section
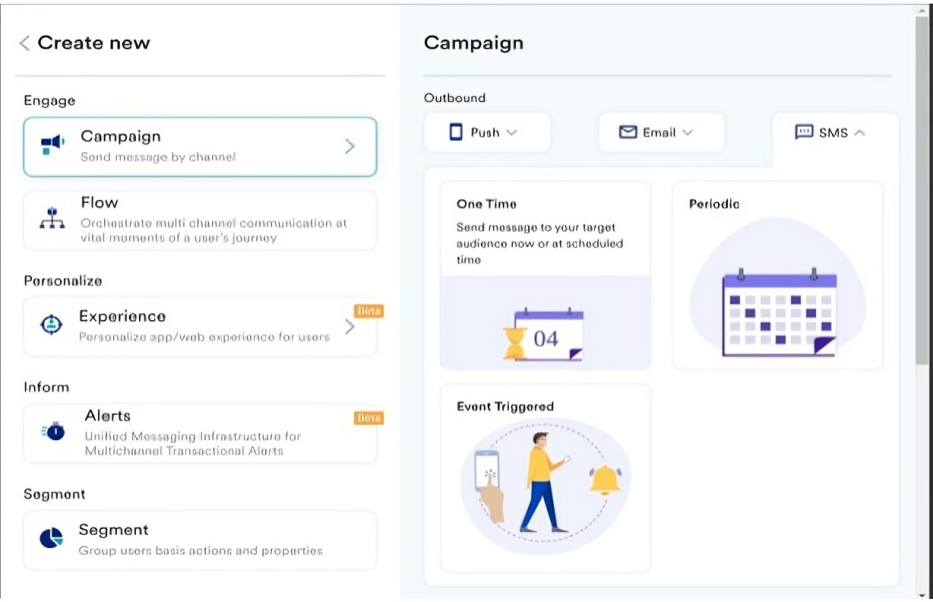
Campaign Creation Initial Screen
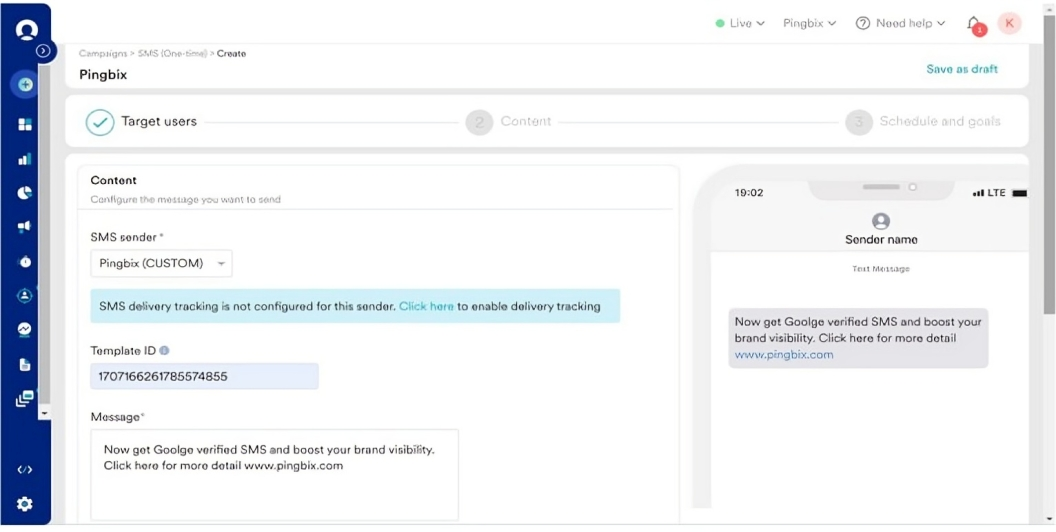
2. Campaign Setup
Configure your campaign settings:
- Select "SMS – one time" for the campaign type
-
Fill in campaign details:
- Campaign name
- Message content
- Sender ID
- Select your target audience
Campaign Setup Configuration
3. DLT Configuration
Configure DLT settings for your campaign:
- Fill in all DLT template details
- Enter your template ID
- Verify template compliance
4. Timing Configuration
Set up the campaign timing:
- Select specific time for campaign delivery
- Choose time zone settings
- Set up any recurring schedules if needed

Campaign Timing Settings
Publishing Your Campaign
Final Review and Publishing
Before publishing your campaign:
- Review all campaign details thoroughly
- Verify audience selection
- Check DLT compliance
- Confirm scheduling settings
- Click the "Publish" button to activate your campaign
Note: Once published, your campaign will be sent to the targeted audience based on your configured settings.